 Paths & Paws
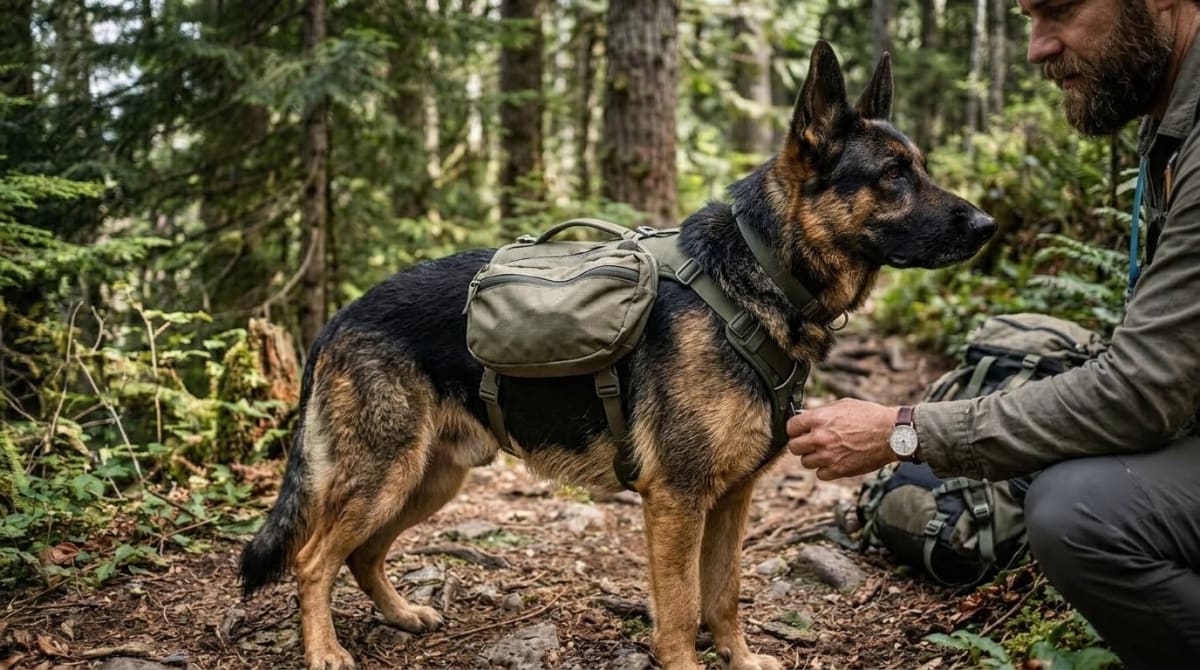
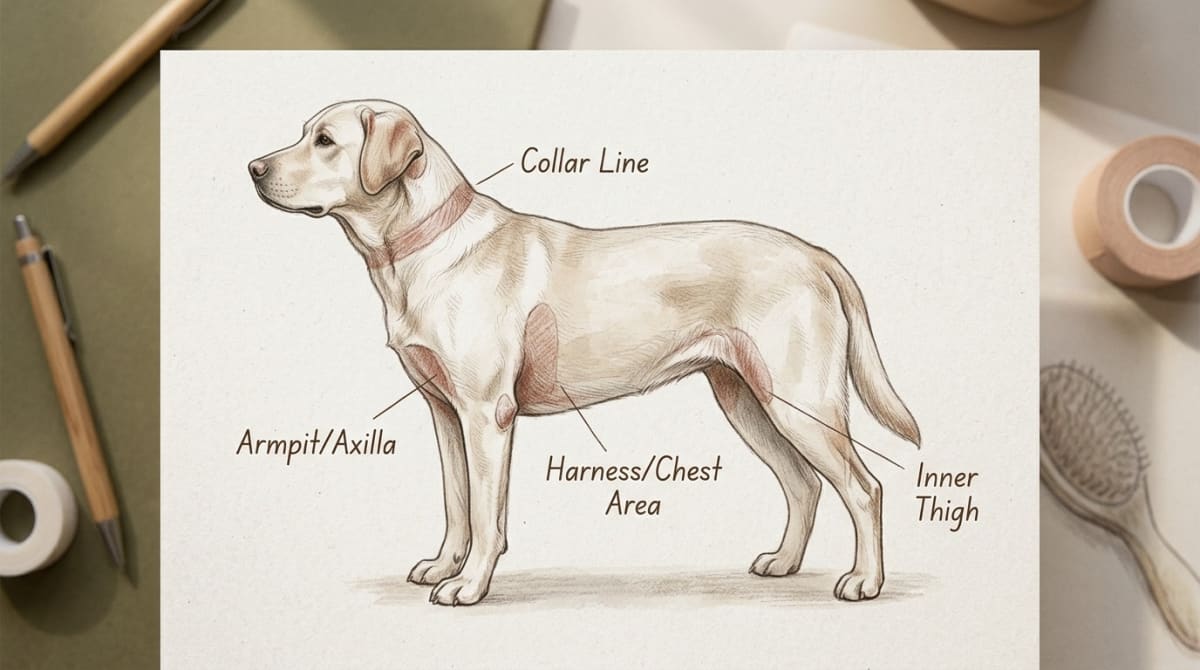
Chafing happens when gear shifts. It's that simple. A sliding dog backpack tears out fur and rips open skin before you even notice. The friction targets the armpits. It hits the chest bone, the lower ribs, and the spine. Balancing the saddlebag weight perfectly and locking down the Y-front chest straps stops the damage in its tracks.
Jasper is a 95-pound German Shepherd. His sheer bulk means any imbalance creates brutal friction. On our third backpacking trip into the Alpine Lakes Wilderness I assumed pulling the straps tighter would stop the saddlebags from swaying. I was dead wrong. By mile eight the rough webbing had carved a raw red stripe into the soft skin right behind both front legs. We quickly learned the real fix. We have to balance the load precisely and let the skeletal structure support the gear.
We know from a 2025 Journal of Experimental Biology study that putting just 10 percent of a dog's body weight into saddlebags forces their center of mass permanently forward. Dogs hit the dirt harder. They put way more weight on their front legs. A 2013 veterinary analysis of harness pressure proved that the right and left sternal regions take the absolute brunt of this continuous force during long miles. If the pack lacks a wide chest plate that concentrated pressure turns into friction. It grinds away the fur and burns the skin with every single step down the trail.
Key Takeaways
- 1Y-front chest designs keep load-bearing straps away from the armpits and shoulder joints
- 2Balance saddlebag weight to the ounce - a half-pound difference shifts the pack and grinds against the lower ribs
- 3Leave two fingers of space under the front belly strap - tight straps rub the elbow joint, loose ones let the bags bounce
- 4Start with an empty pack for one week, then add weight gradually - it takes three weeks for skin to callus
The right setup stops friction
The right foundation comes before you ever touch a strap. A straight horizontal chest strap always drops the backpack right into the armpits. A Y-front base works way better. The Y-shape drops the center ring straight between the front legs. The load-bearing straps stay far away from the shoulder joints. This stops the tough fabric from sawing into the skin when the front legs reach forward on steep inclines. This structural design mimics the pulling harnesses used by sled dogs. Working gear distributes loads across the broad chest muscles while leaving the delicate throat totally free. If you're not sure whether your dog's current pack fits correctly in the first place, our how to measure a dog for a harness guide walks through the chest girth and neck measurements that determine correct sizing.
A simple digital scale stops uneven packing. Kitchen scales work great. Guessing the weight guarantees a lopsided load. Even a half-pound difference between the left and right pockets pulls the entire pack sideways, which forces the dog to compensate by awkwardly altering their natural stride until everything falls out of alignment. That lean causes the belly straps to grind against the lower ribs. An altered stride leads straight to joint fatigue. Our full breakdown of safe loading by breed and weight class lives in the dog backpack weight limit guide.
Friction builds up fast. Preparation matters. Keep a tube of dog-safe healing balm or plain petroleum jelly in the kit. Friction happens incredibly fast in wet conditions. A barrier ointment treats raw red spots on the trail long before they turn into bleeding open sores. We always carry a small tin of paw wax because it doubles as a reliable anti-chafe treatment for the armpits on long days.
Step-by-step adjustment guide
1. Weigh and balance the load
Balance the saddlebags down to the exact ounce. Put water bottles, food, extra leashes, and gear into the bags. Weigh each side independently. Check the numbers. If the left side runs heavier move small items around until both sides match perfectly. A balanced pack stays centered over the spine. It never relies on cranked straps. We always keep the total weight under 10 percent of Jasper's body weight during our first few trips of the season so his skin can slowly build up a thick tolerance to the constant rubbing.
2. Lock in the neck and chest
Slide the pack over the head. Adjust the neck straps first. The padded Y-piece has to sit directly over the prominent sternum bone. It cannot sit high on the soft tissue of the throat or hang low between the front legs. When Jasper carries his full pack on steep rocky trails we keep the neck opening snug. This stops the saddlebags from sliding violently backward down his spine when he jumps over large downed trees.
3. Set the front belly strap
The first belly strap sits just behind the front legs. This is the danger zone. Armpit chafing starts right here. Leave two flat fingers of space between the strap and the skin. A tight strap rubs directly against the elbow joint. A loose strap lets the saddlebags bounce uncontrollably. Make sure the protective padding covers the webbing fully. The soft fabric must touch the dog because exposed webbing slices through the fur and leaves a raw red mark on the ribs after just a few rough miles.
4. Secure the rear stability strap
Most hiking packs feature a second belly strap further back on the ribs to keep the saddlebags from flapping outward when the dog runs. Leave this one looser. Give it some slack. The lower ribs expand widely when a dog pants hard on a brutal summer climb. A tight rear strap restricts breathing. It grinds against the soft flank tissue. We check Jasper's rear strap multiple times a day because the bags tend to shift backward on long uphill climbs, and this shift causes the rear webbing to ride up into his sensitive groin area if left unchecked.
Common packing mistakes that cause sores
A loaded pack destroys the skin of an unconditioned dog. Skin needs real time to adapt. Calluses take weeks to form. A dog cannot go from wearing a lightweight collar in the city to carrying a full overnight pack on a ten-mile mountain hike. Start with an empty pack for one week. Add two pounds the second week. It takes three full weeks for the skin and muscles to adapt to the heavy load without forming painful hot spots. The armpit skin remains soft until regular harness use toughens up that outer epidermis. If you're also wondering when puppies are ready for any pack at all, the dog backpack age limit article covers the growth plate concerns that apply before 18 months.
Hard objects packed against the ribs create instant hot spots. Cans of dog food, metal water bowls, stiff brushes, and rigid camp tools poke right through the thin nylon fabric. The ribs push against these hard edges with every single breath. This causes massive friction. Pain builds up quickly. Pack soft items like spare leashes, paw booties, towels, or kibble bags against the inner wall of the saddlebag to build a cushion between the rigid gear and the ribs. Push the hard items outside. Wrap metal bowls in sleeping bag liners or spare fleeces. The side resting against the dog has to feel like a soft pillow.
Low-hanging saddlebags ruin the center of gravity. Keep the weight sitting high. If the bags hang down near the elbows they swing like unpredictable pendulums. That swinging motion forces the harness base to saw back and forth across the spine. We check Jasper's pack constantly on the trail to verify the bags remain high and tight, pulling the straps up whenever the fabric starts sagging under the weight of his water bottles. Some cheap backpacks use weak buckles that slip the second they face any real tension. If the bags droop every thirty minutes replace the hardware or ditch the pack entirely.
Frequently Asked Questions
Filed under
Kelly brings an engineering mindset to dog hiking gear. After thousands of miles with Jasper testing every harness, pack, and boot on the market, he knows what holds up and what fails.