 Paths & Paws
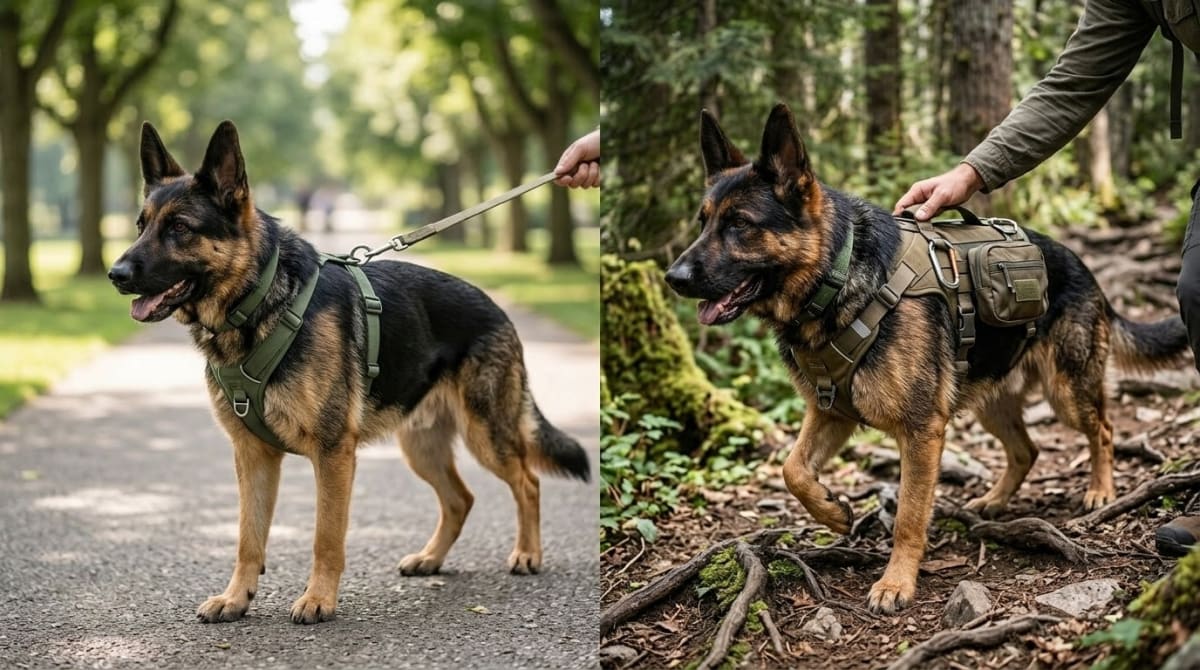
Most hikers assume everyday walking gear handles wilderness terrain just fine. The truth usually surfaces around mile ten. A standard harness often causes severe shoulder chafing on heavy grades. You can definitely use a simple setup for flat day hikes under five miles. Push past that limit and the physics of how straps interact with a moving dog shift drastically.
We hit this wall with Jasper. He is a 95-pound German Shepherd. On a rocky section of Mount Si, his casual mesh harness tore near the chest plate under moderate side tension. We suddenly lost our safest method for guiding him down the mountain. Street walkers lack the reinforced load distribution required for vertical gain. A specialized rig becomes mandatory when the route involves rock scrambles, water crossings, extended leash pulling, or distances over eight miles. It keeps a dog moving safely through harsh environments because the technical webbing distributes extreme tension across their skeletal structure, preventing narrow nylon bands from digging into vulnerable tissues during brutal mountain ascents.
Key Takeaways
- 1Walking harnesses use 0.75-inch single-ply webbing and plastic buckles; hiking harnesses use 1.25-inch straps and metal V-rings rated for backcountry stress.
- 2A 2019 Veterinary Record study confirmed restrictive harnesses shorten a dog's stride and exhaust stabilizer muscles over long distances.
- 3Y-neck design clears the shoulder blades entirely, preserving full range of motion for jumping and climbing on technical terrain.
- 4Fit a hiking harness by measuring ribcage girth rather than body weight, then confirm with the two-finger rule under every strap.
The structural divide between walking and hiking gear
Walking harnesses prioritize easy clipping for quick neighborhood trips. Brands build them with minimal fabric to keep the dog cool and they rely on standard plastic buckles. That webbing is usually just single-ply nylon.
Hiking harnesses are structural tools. They distribute force across the dog's skeleton. We measured strap width on everyday walkers versus trail models in our gear room. The walking straps measure about 0.75 inches wide. Backcountry straps average 1.25 inches. That extra half-inch matters immensely. A wider strap drops the pressure per square inch on the skin. When Jasper pulls uphill a narrow strap becomes a wire. By replacing flimsy webbing with a properly engineered strap, we immediately spread that pulling force over a much larger surface area and protect the dog from deep bruising.
Stitching patterns also reveal what the gear is actually built to handle. Entry-level setups rely on straight stitches at the junction points. Trail equipment uses bar-tack stitching. You will see a dense zigzag pattern forming a small rectangle at every high-stress connection point. Gear companies use this identical sewing technique on rock climbing harnesses for humans. It prevents the thread from unraveling when the fabric stretches under heavy loads.
Padding placement changes completely between the two categories. Basic designs might throw a light layer of fleece behind the front legs. Backcountry models use dense closed-cell foam along the entire chest plate and belly panel, forming a physical barrier that prevents abrasive dirt from grinding into the armpits during long days of continuous movement. This foam repels water. It stops grit from building up. A casual harness just absorbs sweat and holds onto that dirt. That trapped grit turns a casual harness into sandpaper after two hours of constant movement.
The physics of trail failure
Why do daily harnesses blow out in the backcountry? The answer involves repetitive motion and angle of pull.
Veterinary researchers track precisely how gear alters a dog's stride. A 2019 study in the Veterinary Record measured shoulder extension in dogs at a walk and trot. They found that restrictive chest harnesses actually alter the natural reach of the front legs. Standard designs typically sit dead center across the shoulders. This horizontal strap forces the dog to take shorter chopped steps.
On a neighborhood sidewalk you might not notice the change. On a ten-mile trail with massive elevation gain, those restricted steps force the dog's back muscles to compensate for the lost front-end momentum. When an animal hikes for several hours with their natural gait restricted by a poorly fitted horizontal strap, this unnatural motion exhausts secondary stabilizing muscles and heavily increases the risk of soft tissue injuries.
Side loading is the second major failure point. Walking harnesses handle straight forward pulling just fine but they fold under lateral stress. If a dog slips on a wet rock and shifts their weight to the side, a typical harness twists. Plastic buckles dig into the ribs. The chest strap slides right into the armpit. We watched this happen with Jasper on multiple switchbacks before we upgraded our setup to the Ruffwear Web Master after about 120 trail miles in casual gear. The twisting motion puts incredible strain on flimsy seams. Those seams eventually pop.
Heat management wrecks dogs on long mileage days too. A regular harness traps heat right over the core. Many cheap designs use large patches of unventilated neoprene or solid polyester across the back. Dogs cool themselves primarily through panting and releasing heat through their paws. Covering their back with non-breathable fabric creates a localized greenhouse effect. Real backcountry gear uses a minimalist skeletal frame over the top to allow maximum airflow while keeping the structural support concentrated on the chest and belly where the pulling forces actually land.
Mandatory elements of a backcountry harness
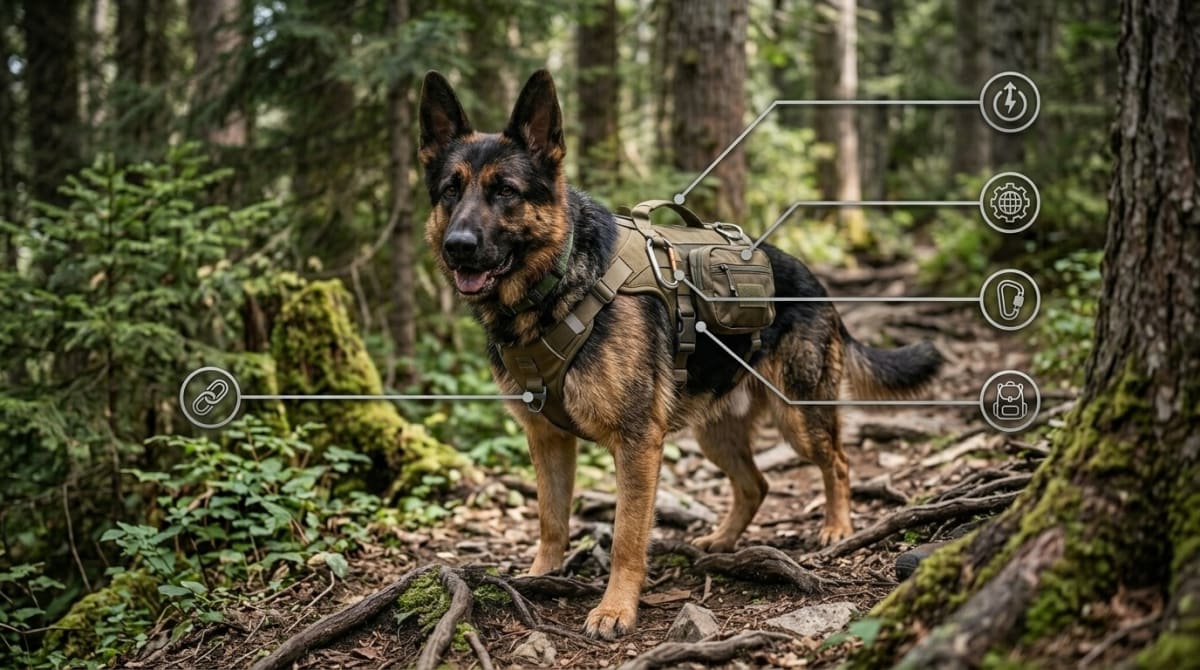
Upgrading to a hiking harness solves these mechanical problems. You will notice four hardware differences on a true backcountry model.
First, trail gear includes a reinforced lift assist handle. A neighborhood harness sometimes has a small grab loop on the back. Do not use this to lift a large dog. Standard webbing just rips out of cheap seams under dynamic loads. Hiking harnesses route the handle webbing entirely around the chest cavity. You are lifting the animal from beneath the ribcage instead of pulling the skin upward. Jasper weighs 95 pounds. Lifting him over a downed cedar tree puts massive stress on our gear. When we hoist a large dog over an obstacle, a continuous structural webbing loop handles that weight safely by transferring the load across the entire chassis of the harness rather than stressing one weak patch of fabric.
Second, backcountry models use a Y-neck design. The straps form a Y-shape squarely on the sternum. This clears the shoulder blades entirely. The dog retains full range of motion for jumping and climbing. The Y-shape also prevents the gear from choking them out during steep descents when leash tension pulls backward. If you want more detail on what separates these designs mechanically, our guide to non-restrictive dog hiking harnesses goes deep on the shoulder biomechanics.
Third, look for an extended belly strap. Most daily walkers have two main straps. One goes around the neck and the other goes around the chest just behind the front legs. A true trail harness adds a third strap further back on the lower ribcage. This rear strap prevents the dog from backing out of the equipment during a panic moment. It also stabilizes the entire rig. That extra anchor point stops the front chest strap from creeping into the armpits and causing friction burns.
Finally, backcountry setups upgrade the attachment points from plastic to metal. Common D-rings bend open under sudden shock loads, so trail models use anodized aluminum V-rings instead. These anchors take hundreds of pounds of force. They survive direct impacts against granite boulders without cracking.
How to transition to trail gear
Moving from a casual walker to a trail rig requires careful fitting. You cannot just guess the size based on weight alone. A 60-pound Greyhound needs a drastically different shape than a 60-pound Bulldog.
You need a flexible measuring tape. Measure the girth at the widest part of the ribcage. This spot sits just a few inches behind the front legs. That measurement determines the core size for almost every major gear brand out there. We walk through the full process step by step in our how to measure your dog for a harness guide if you want the detailed breakdown.
Follow these steps before hitting the dirt. First, loosen all straps entirely. Slip the neck opening over the dog's head. Second, clip the chest straps and adjust them until you can slide two fingers flat under the webbing. Third, clip the rear belly strap and leave it slightly looser than the chest pieces. The belly strap sits on softer tissue and requires a bit more breathing room. Next, ask the dog to sit and check the sternum pad. The Y-shape should rest exactly on the breastbone.
Hikers often leave the harness loose to prevent chafing. A loose harness causes more friction. If we leave the straps completely slack in a misguided attempt to maximize comfort, the excess fabric will slide aggressively back and forth with every single step and create the precise friction burns we wanted to avoid. We want a snug fit that stays anchored in one place while the dog actually moves. Test the fit on two or four short neighborhood loops before committing to a full day out in the mountains.
Frequently Asked Questions
Kelly brings an engineering mindset to dog hiking gear. After thousands of miles with Jasper testing every harness, pack, and boot on the market, he knows what holds up and what fails.