 Paths & Paws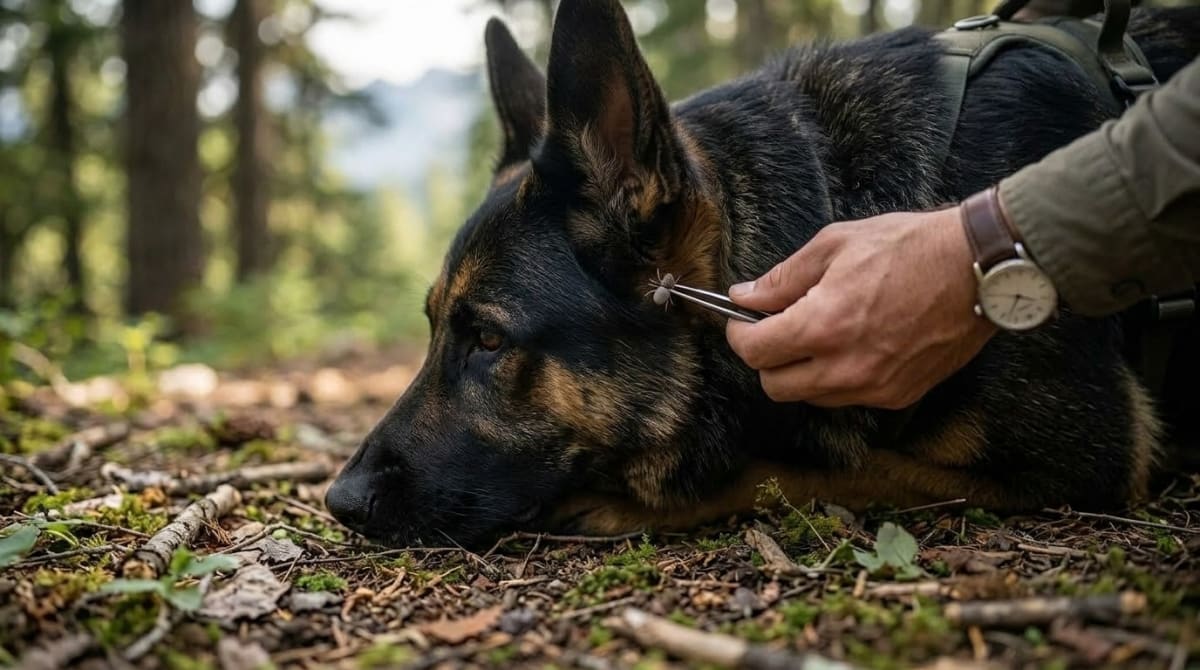
Finding a parasite anchored to a dog miles from the trailhead sparks instant anxiety. Waiting until getting back to the car isn't an option. Grab fine-tipped tweezers. Pinpoint the head. Pull straight up. Don't twist. The faster that pest comes off, the lower the risk of disease transmission.
I learned this the hard way with Jasper. He's a 95-pound German Shepherd, and his dense double coat makes finding a sesame-seed-sized bug feel practically impossible. During a multiday trek in the Cascades, I ran my hands through his ruff and felt a tiny, hard bump right behind his ear. My first instinct was to grab it and just wrench it off. Bad idea. Studies show twisting drastically increases the odds of leaving mouthparts stuck in the skin, which usually triggers painful local infections and turns a simple bite into a week-long veterinary ordeal.
Pulling the bug immediately on the trail is the best way to protect the dog. Data shows some tick-borne pathogens transmit incredibly fast once the feeding cycle starts, meaning every single hour that passes ticks the risk higher.
Key Takeaways
- 1Pull straight up with steady pressure using fine-tipped tweezers - never twist or squeeze the swollen body
- 2Remove ticks immediately because some pathogens like Babesia canis can transmit within 8 hours of attachment
- 3Pack a dedicated two-ounce tick kit with fine-tipped tweezers, a sealed vial, alcohol wipes, gloves, and a headlamp
- 4Save the specimen in a sealed vial and monitor for lethargy, shifting lameness, or fever for up to two months
The Biology of a Tick Bite
Ticks don't just take a bite and leave. They cement themselves into place. When one drops onto a dog's coat from passing brush, it hunts for a warm, hidden spot to dig in. It uses specialized mouthparts to slice into the skin before inserting a feeding tube covered in backward-facing barbs. Then comes the worst part. The parasite secretes a literal glue through its saliva to lock itself down for a meal that stretches on for days.
This complex anchoring system explains why pulling them out feels so tough. It breaks a cemented bond. The sheer strength of that glue is exactly why clumsy removal attempts fail so often. Pinching the swollen abdomen and squeezing acts like a living syringe. This ends up forcing infected fluid right back into the dog's bloodstream. Bypassing that swollen body completely is critical for safe removal. Focus all mechanical force strictly on the anchor point down at the skin line.
What You Need for Trail Removal
Pack a dedicated tick kit. The whole setup weighs maybe two ounces. Having the right tools matters here, because trying to pull a tick with bare fingers is a massive gamble that almost always ends with a crushed bug.
- Fine-tipped tweezers. Standard blunt bathroom tweezers usually crush the body before they get a solid grip, while pointed tips slide right under the abdomen.
- A small sealed container. A clean plastic vial works perfectly to save the specimen for vet testing later.
- Alcohol wipes to clean the bite site after extraction.
- Disposable gloves. Pathogens can enter through microscopic cuts on human hands, so protect bare skin.
- A bright headlamp. Extracting a tiny bug requires good lighting. A headlamp frees up both hands and blasts light straight through thick undercoats.
Step-By-Step Trail Removal
Field removal takes patience. Jasper hates holding still the second we stop hiking. I usually have to wedge his massive frame against my leg to keep him grounded, especially if other dogs walk past. Follow this sequence for a clean extraction.
Step One
Calm the dog down. A dead-clear line of sight to the attachment point is essential. Use fingers to part the hair away from the bite site. If a hiking partner is around, ask them to hold the dog steady and feed high-value treats as a distraction. For solo hikers with large breeds, command a strict down-stay and kneel right beside the shoulder.
Step Two
Position the tweezers. Slide the metal tips completely flush against the skin. The goal is to grip the head and mouthparts. Never grab the bloated body. Crushing that abdomen guarantees a rush of stomach contents will flood the wound. Approach from the side to get the cleanest angle under the bug.
Step Three
Pull straight upward. Use steady and even tension. Don't jerk the tweezers. Don't wiggle them back and forth. The skin will actually pull up like a tiny tent before the tick finally lets go, which looks alarming if it's a first-time removal. Hold the grip until the cement snaps. The parasite will release. This standoff might take ten or fifteen seconds of continuous pulling.
Step Four
Check the specimen immediately. Look for the whole head still attached to the body. It looks like two tiny pincers sticking out the front. If the head breaks off and stays in the skin, leave it alone. Digging causes severe tissue damage. The body naturally expels those leftover pieces over a couple of weeks, exactly like a small splinter working its way out of a thumb.
Step Five
Clean up. Scrub the area thoroughly with an alcohol swab. Wash hands or use hand sanitizer right away, even if gloves were worn.
Common Mistakes That Increase Disease Risk
Spotting a parasite stuck to a pet causes panic. Panic breeds terrible decisions. The trail is no place to test out folklore remedies.
People often hear old advice about burning the bug with a match. Don't do this. Applying intense heat traumatizes the tick, causing it to vomit infected saliva straight into the host. Plus, setting dry dog hair on fire is a real risk.
Another terrible myth involves smothering the bite site with petroleum jelly or essential oils. The theory goes that the tick will suffocate and back out on its own. Ticks breathe extremely slowly. Suffocation takes hours. While waiting, the bug just keeps feeding and passing along pathogens. Veterinary research proves certain diseases move fast. A 2018 study in Parasites and Vectors showed Babesia canis can jump from tick to dog within eight hours of initial attachment. Every minute counts. There simply isn't time to wait for a smothered pest to retreat.
Twisting remains the most common error hikers make. Specialized tick-twister tools do exist and work fine if used exactly to manufacturer specs. But twisting with standard straight tweezers is a disaster. The mouthparts will snap off inside the dermis. A 2017 systematic review in the Australasian Medical Journal confirmed that pulling straight up with fine forceps gives the most consistent and safe removal.
Securing and Storing the Specimen
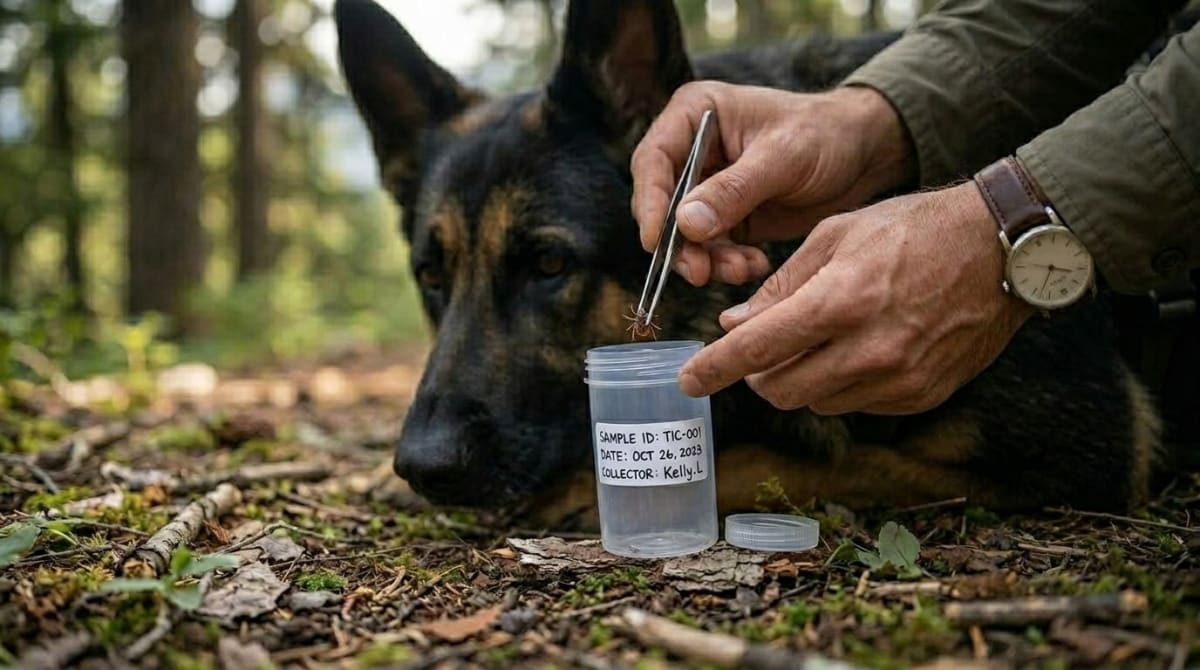
Don't fling the tick into the brush. Keep it. If Jasper spikes a fever a month after a hike, our vet needs to know the exact species we're dealing with. Different bugs carry entirely different threats. Deer ticks spread Lyme disease. American dog ticks carry Rocky Mountain spotted fever.
Drop the specimen into the plastic vial. Add a few drops of rubbing alcohol to kill it. Without a vial, fold the bug inside a piece of clear tape. This traps it securely without crushing anything. Snap a clear photo of the trapped pest with a phone right there on the trail. That timestamp and GPS location give the vet critical epidemiological data.
Back home, toss the sealed vial or taped bug into the refrigerator. Cold preserves the body for accurate identification if testing becomes necessary down the road. Label the container with the date and the specific trail name.
Post-Removal Monitoring and Vet Follow-Up
The job isn't over when the bug comes off. Watch the dog closely for several weeks. Tick-borne illnesses have notoriously long incubation periods. Symptoms might hide for a month or more.
Check the bite site daily. A small red bump is a totally normal localized reaction to the saliva. It should look somewhat like a mild mosquito bite and fade within a week. If the redness expands into a massive inflamed ring, or starts oozing pus, call the clinic. Just keep in mind that dogs rarely develop the classic bullseye rash seen in humans with Lyme disease.
Watch for systemic changes. Early signs of tick-borne disease look incredibly subtle. A dog might just lag behind on morning walks. Jasper usually charges ahead on the Mount Si trail. If he suddenly refused to keep pace or needed extra rest breaks, I'd suspect an issue immediately. Knowing your dog's normal trail behavior is half the battle - recognizing the signs a dog is too tired helps distinguish genuine exhaustion from early illness. Look for unexplained lethargy. Watch for a sudden refusal to eat breakfast.
A shifting lameness that moves from one leg to another is a hallmark sign of Lyme disease in dogs. Other concerning symptoms include swollen lymph nodes, an unexplained fever, and heavy panting while resting in a cool room.
If any of these signs hit within two months of the bite, book a vet appointment. Bring the saved specimen. Tell the clinic exactly when and where the exposure happened. Early intervention with targeted antibiotics clears up most tick-borne infections fast.
Checking the Dog After the Hike
Prevention beats extraction every time. Run a thorough physical inspection before even opening the car doors at the trailhead. Press hands tightly against the skin. The goal is to feel for small bumps rather than rely on eyes.
Pay close attention to high-risk zones. Ticks migrate toward warm, dark places with thin skin. Check between the toes. Inspect the armpits and groin. Lift the ears and look deep inside the folds. Run fingers directly under the collar.
Brush the dog with a fine-toothed comb before loading up. A sticky lint roller also works surprisingly well for picking up unattached nymphs crawling on the surface of the coat. That one simple trick captures dozens of tiny pests before they ever find a place to dig in.
A thorough post-hike inspection fits naturally into the full after-hike cleaning routine, which covers paw checks, coat brushing, and gear decontamination in sequence.
Frequently Asked Questions

Kelly brings an engineering mindset to dog hiking gear. After thousands of miles with Jasper testing every harness, pack, and boot on the market, he knows what holds up and what fails.