 Paths & Paws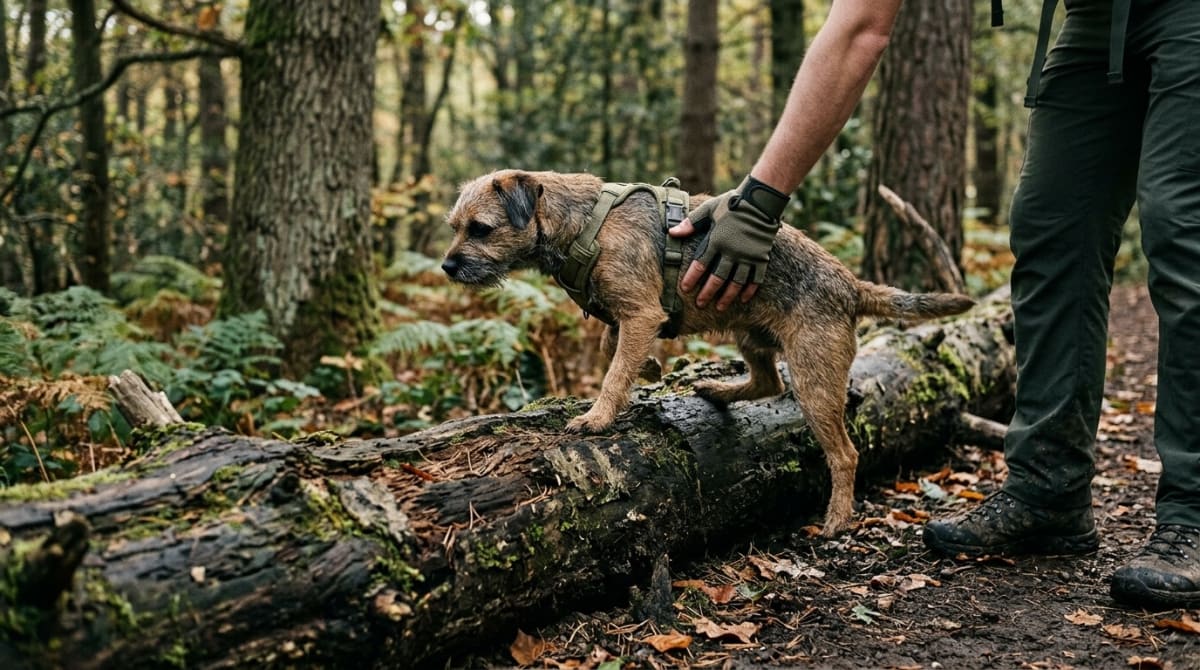
Scout is a 50-pound Lab mix. She vaults over rotting cedar trunks without breaking stride. But when we hike the Pacific Northwest trails with my friend's 12-pound Terrier Toby, the woods turn into a towering steeplechase. A log that barely reaches my shin becomes a chest-high barricade for a dog that tiny. We figured out fast that you cannot just yank a little guy over a deadfall by the collar or scoop them up by the armpits, because doing that puts them at massive risk for dislocated shoulders or compressed discs. You need a plan. Gear matters here. When we help a small dog conquer vertical rock faces and giant blowdowns, we have to balance safe physical support with building their actual trail confidence so they eventually learn to read the terrain themselves.
Key Takeaways
- 1Obstacle height rule: if it sits taller than 1.5x the dog's shoulder height, step in - unassisted drops from that height hammer front carpal joints
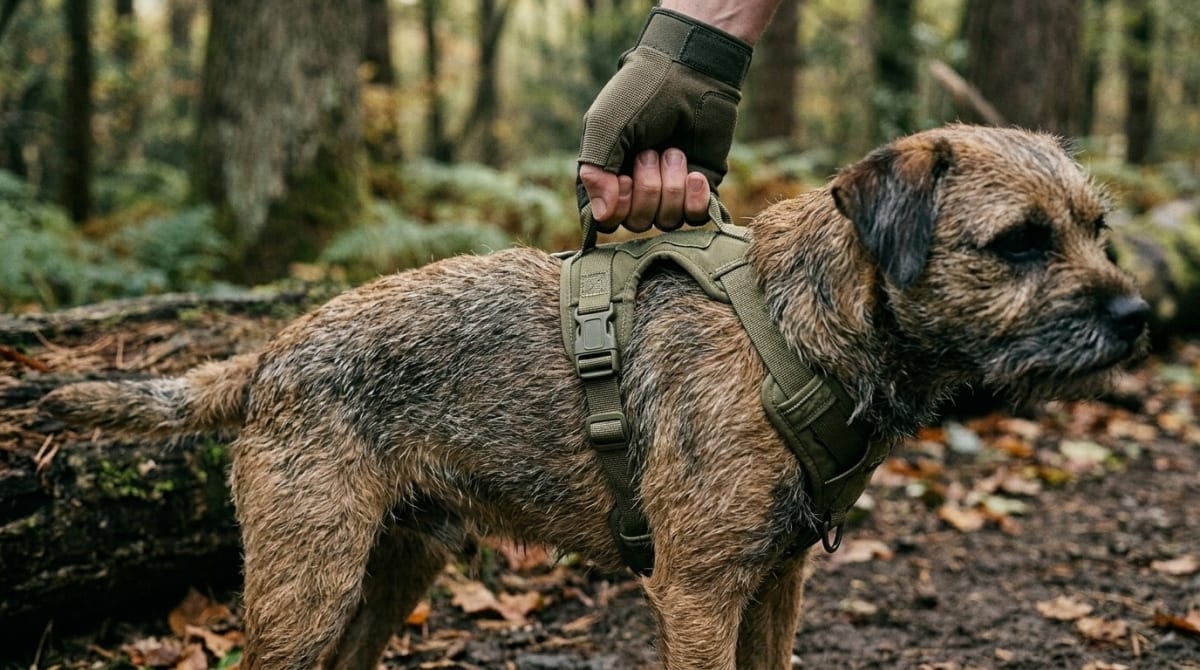
- 2The suitcase lift - grip the top harness handle, scoop under the back legs to keep the spine flat, guide all four paws down to solid ground
- 3Use a Y-front harness with a padded chest plate and solid top handle - collar pressure can trigger tracheal collapse in small breeds during lifts
- 4Let them puzzle out low obstacles on their own. Over-assisting creates passive dogs that stall at every root and root cluster
What You Need
Check the kit before leaving the pavement. A proper lifting harness is non-negotiable. Small dogs like Yorkies and Pomeranians pack notoriously fragile windpipes. A 2018 veterinary guide from VCA Animal Hospitals points out that collar pressure dangerously chokes off their air supply and sometimes triggers emergencies that end a hike instantly. We look for a Y-front harness with a padded chest plate and a thick back grip bolted right over their center of mass, because a standard walking rig will just slide up into their throat and gag them mid-air. Grab a static leash. Those retractable lines just turn into tripwires during rock scrambles. They offer zero hold when a pup slides out. That slack becomes an active liability on loose gravel where getting hands on the dog's harness right that second makes all the difference in preventing a nasty fall.
Step-by-Step Guide to Trail Obstacles
Step 1. Read the Height
Pause and look. Size up the barrier before the dog commits. If a deadfall sits higher than one and a half times their shoulder height, step in. Bailing out off a boulder that tall hammers those tiny front carpal joints and invites severe spinal compression, which explains why long-backed hiking buddies like Dachshunds take the worst beatings on technical routes.
Step 2. Ask for a Pause
Drill a solid wait cue. We run this constantly with Scout at muddy creek crossings. Park the pup about two feet back from the trunk. That buffer kills the urge to launch blind over a massive stump where they have zero clue what the landing zone looks like, keeping them from nose-diving into jagged stones or leg-breaking holes.
Step 3. Let Them Puzzle It Out
Hunt for natural ramps. Pups gain grit when they crack the code themselves. We steer Toby toward low divots in fallen timber or stacked rocks on the dirt shoulder so he can scramble up safely. That builds real trail smarts instead of turning us into full-time sherpas for every little bump.
Step 4. Do the Suitcase Lift
Grab the top strap. Never yank the leash. Hoist straight up like a heavy duffel bag while swooping your free hand under their back legs for rear support, which locks their spine in a completely flat position through the whole swing and stops that horrible lower back sag. Dragging a terrier upward by the front armpits applies brutal twisting forces to their shoulder sockets. It begs for a popped joint. If a lift goes wrong and a small dog injures a paw or shoulder on the descent, our guide on how to carry an injured dog off the trail walks through safe extraction techniques for the hike back.
Step 5. Touch Down with Control
Manage the drop. Don't just let go. Guide the dog down smoothly until all four pads make firm contact with the pine needles. We keep a tight grip on that rig a beat longer if the drop zone looks steep or washed out, buying them a solid anchor point while their paws figure out the shifting mud.
Common Mistakes When Assisting Small Dogs
People rush this and manufacture anxious dogs. The absolute worst move is hauling a compact dog upward without warning. Grabbing them off the dirt out of nowhere fires off a massive startle reflex that makes them thrash in the air, snap at hands, or severely tweak their spine. We use a strict cue word like "up" a second before wrapping fingers around that harness rig, giving them time to tighten their core muscles and brace for the sudden altitude change.
Don't baby them. Carting a little guy over every single root system kills their conditioning. They turn into passive baggage. Toby used to sit and stare at us before every two-inch pebble until we flat out ignored him and made him hike the small stuff.
Trust vanishes fast. Hikers blow it on the landing spots. Swinging a pup over a cedar trunk and dropping them blind into a thorn bush or a deep mud hole shreds their confidence for miles, so always lean over and check the far side before pulling the trigger on a lift. Young dogs navigating obstacles for the first time also need more recovery time between technical sections - the same growth plate caution that applies to distance hiking applies here, with most toy breeds needing twelve months before their joints can safely absorb repeated drop impacts. Our guide on how far dogs can hike by age covers the full developmental timeline.
Frequently Asked Questions
Filed under
Sarah is learning to hike with dogs alongside her readers. Scout is her first trail companion, and she shares every mistake, success, and lesson learned along the way.
References & Further Reading
- Tracheal Collapse in Dogs — VCA Animal Hospitals (2018)