 Paths & Paws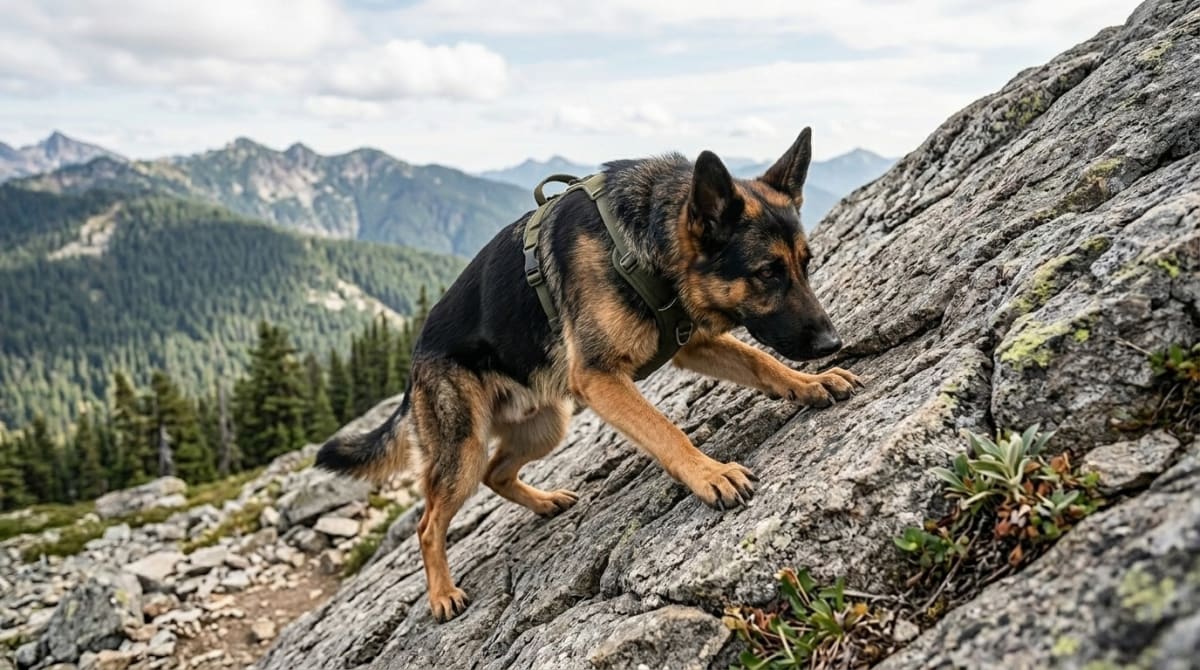
Most hikers figure four legs automatically mean stability on sheer rock. They are wrong. A dog relies heavily on forward momentum to clear trail obstacles, which becomes outright dangerous the second a path turns into a vertical scramble. Jasper is a 95-pound German Shepherd. When his weight shifts unexpectedly on a narrow ledge, gravity does not forgive.
We spent three seasons tracking canine movement on the punishing, rocky upper sections of Mount Si, cross-referencing our own trail time with veterinary orthopedic data to map exactly where a dog's natural climbing instincts fail them on steep exposure. If you are still deciding whether to bring your dog onto scrambling terrain at all, our overview of hiking with dogs on rock scrambles covers route selection from the ground up. The fix requires adapting the mountaineering standard of three points of contact for dogs. This means deliberately braking their pace so three paws remain glued to the rock while one moves. It stops the lunging. This protects their joints.
Key Takeaways
- 1Three points of contact means three paws stay anchored while one moves - this stops the launch instinct that causes falls on exposed rock
- 2Evaluate the descent before committing to any climb. Downhill movement causes extreme joint stress that can snap a cruciate ligament
- 3Use a mobility harness with a back handle and a short two-foot traffic leash for spotting and control on technical terrain
- 4Turn back immediately if your dog hesitates at edges or cannot pull their own weight over an obstacle unassisted
How Canine Biomechanics Change on Technical Rock
Human climbers learn early to keep two hands and one foot, or two feet and one hand, locked on the face at all times. Dogs naturally do the exact opposite. When staring down a boulder problem, a dog's gut instinct is to bound over it. They load power into their hindquarters and launch both front paws simultaneously. This sets up a terrifying two-point or zero-point contact scenario mid-air. That works fine on flat dirt. Miss a jump on a knife-edge ridge and you fall.
Data from a 2010 American Journal of Veterinary Research study proved that uphill movement demands severe flexion in the front limbs. If a dog launches upward and misses that target hold, those over-flexed front joints take the entire shock of their body weight sliding backward, often tearing connective tissue or triggering an ugly slide down the mountain. We saw this early on with Jasper. His heavy frame would smack a ledge and bounce before he clawed desperately for purchase.
Teaching three points of contact forces a complete mechanical reset. You require them to step rather than jump. One paw moves up to hunt for a secure crack. The other three stay anchored. Once the front paw is stable, a hind leg advances. This constant friction keeps a dog's center of gravity pinned firmly against the wall. Jumping transfers heavy torque to the spine, whereas enforcing the three-point rule strips that jarring torsion away completely. The leg muscles do the lifting. The dog stops relying on explosive momentum. It takes immense mental restraint for a high-drive dog. We force them to keep their mass anchored against the granite.
Reading the Route and Setting Hard Limits
Knowing how to assist your dog helps on the trail, but knowing when to pull the plug matters more. Scrambling grades that feel like a fun puzzle to a human often present impossible geometry for a dog. We measure safety by looking at the angle of decline and the distance between stable footholds, carefully calculating whether our dogs can cross the gaps without launching themselves into empty space.
Going up is mostly cardiovascular. Coming down is purely orthopedic. A 2010 Journal of Small Animal Practice study tracked pelvic limb kinematics during downward movement and found extreme flexion in the lower leg joints. When a big dog like Jasper jumps down a four-foot drop, those joints absorb shock forces that can easily snap a cruciate ligament. You have to evaluate the descent before committing to the climb.
Look for continuous ledges. A dog needs a landing pad at least as long as their spine. If the route forces them to drop blindly onto a narrow shelf, the terrain is too risky. You also have to test the rock itself. Solid granite grips well when dry. Sandstone crumbles under claws. Loose scree slopes act like ball bearings under a dog's feet. If the rock shifts when we test it, we never let the dog commit their weight there. Wet rock multiplies this danger. Once rain or morning dew slicks a slab, paw pads lose their grip entirely.
Turn back immediately if the dog hesitates at edges. Fear means they cannot visualize a safe landing. Turn back if the only way up involves hoisting the dog by their gear. If they cannot pull their own weight over the obstacle, they definitely cannot climb back down it later. Jasper hides his discomfort well. We have to watch his ear position and breathing rate to gauge his stress on technical pitches. A dog panting heavily with pinned ears is operating in panic mode. Turn around before they make a lethal mistake.
Field Techniques for Assisted Scrambling
Training this behavior takes serious patience. You are fighting thousands of years of evolutionary momentum. Our goal is creating a communication loop where the dog waits for verbal clearance before moving their next paw. We start this work on small neighborhood boulders before hitting real trails. You cannot teach this on a cliff.
First, dial in the gear. A standard walking collar is completely useless here. We require a structural mobility harness with a burly back handle and a padded chest plate. Attach a short, two-foot traffic leash. Long lines just get tangled in rocks and create tripping hazards for both of you, which becomes a fatal flaw on exposed pitches.
Second, watch their head position. A dog looks exactly where they intend to land. If their nose points upward at a sharp angle, they are gearing up to launch. We use the harness handle to guide Jasper's head slightly downward. This breaks his upward focal point. It forces him to look at the rock immediately in front of his chest.
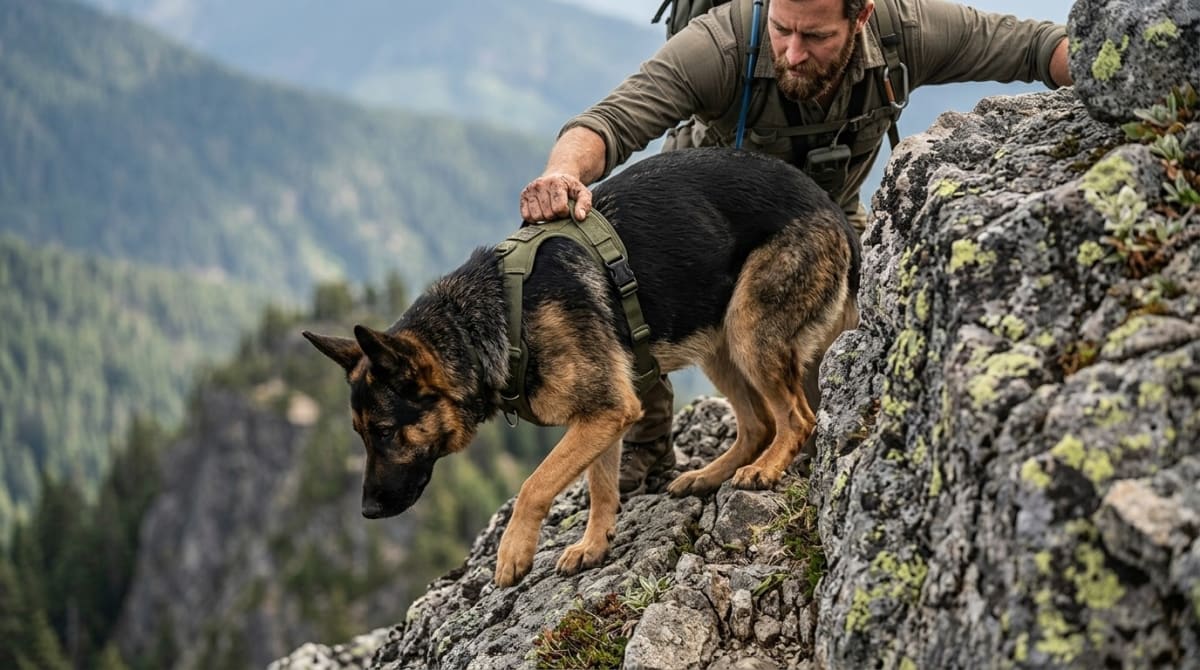
Third, get your own position right on the ascent. Stay right behind the dog. Your main job is spotting. Keep one hand firmly on their back handle. Apply slight backward pressure to interrupt their instinct to jump. You act as their brake. Encourage them to step up with one paw while maintaining steady tension on their gear, deliberately forcing them to distribute their full body weight carefully across the remaining three anchored limbs before advancing further. Praise them the second they lock in a solid plant. Let them hunt for the next hold.
Fourth, manage the descent carefully. This is where most blowouts happen. You must go first. Climb down to the next stable ledge and turn around to face the dog. Block their path with your body. Place hands firmly on their ribs or top handle to catch their momentum. Command them to step down slowly. If the drop sits taller than their shoulder height, provide physical support to ease them down. Never let them free-fall.
Fifth, read the tension in the gear. A dog maintaining three points of contact feels rigid and controlled under your hand. If they feel squirmy or weightless, they are trying to rush the problem. Stop all forward progress. Make them hold position until they settle. Once they relax, you can resume the climb.
Where Handlers Fail on Technical Rock
The worst mistake we see on Pacific Northwest trails is the pendulum swing. Handlers keep a tight, long leash anchored above the dog. If the dog slips, that leash acts exactly like a pendulum, swinging them violently into the rock face. The goal is horizontal control.
Another huge error is treating the dog's gear like a crane. Handles exist strictly for spotting and guidance. Placing the entirety of a dog's mass on a few strips of nylon creates extreme risk of catastrophic failure. When inexperienced handlers dead-lift a dog strictly by their back panel, the harness chest plate compresses their airway and painfully crushes their natural front shoulder geometry, risking severe long-term injury. If lifting them entirely becomes necessary, the route exceeds their physical limits. If an injury does happen out there, knowing how to carry your dog off trail safely is the skill that gets you both home.
Finally, do not let the dog dictate the pace. A nervous dog just wants to rush through scary terrain. Speed creates disastrous errors on slick granite. We always control the pace. Keep them close and keep hands on their gear to force them to think about every single foot placement. It takes time.
Frequently Asked Questions
Kelly brings an engineering mindset to dog hiking gear. After thousands of miles with Jasper testing every harness, pack, and boot on the market, he knows what holds up and what fails.